Building an App-to-App Calling Feature with Flutter and EnableX
Are you a developer looking to create an app with audio and video calling capabilities? You have come to the right place! This blog explores the seamless creation of an app-to-app calling feature using Flutter and EnableX, a robust platform for real-time communication solutions. However, in this blog, we will address all your questions and provide you with a roadmap using these technologies to get started on this exciting journey.
Introduction to Flutter and EnableX
Flutter is a popular open-source UI software development kit created by Google, perfect for developing natively compiled applications. When combined with EnableX, a powerful communication platform, it enables the creation of feature-rich flutter based calling applications.
Why Choose Flutter with EnableX?
Flutter’s Cross-Platform Excellence: Flutter has emerged as a leading framework for mobile app development, allowing developers to write a single codebase for both iOS and Android platforms. Therefore, its hot reload feature, rich set of pre-built widgets, and ability to integrate with existing code make it an ideal choice for modern app development.
EnableX’s Real-Time Communication Capabilities: EnableX provides a suite of APIs and SDKs for embedding video, voice, and messaging functionalities. However, it stands out for its ease of integration, scalability, and reliable backend support, essential for real-time communication features.
Practical Use Cases: Flutter and WebRTC in Action
The combination of Flutter and WebRTC opens up a plethora of practical use cases across various industries.
Healthcare: With Flutter’s cross-platform capabilities and WebRTC’s real-time communication, telehealth apps can facilitate secure, efficient video consultations between doctors and patients, making healthcare more accessible.
Education: E-learning platforms can harness these technologies to create interactive virtual classrooms. Therefore, flutter ensures a consistent user experience across devices, while WebRTC enables real-time student-teacher interactions.
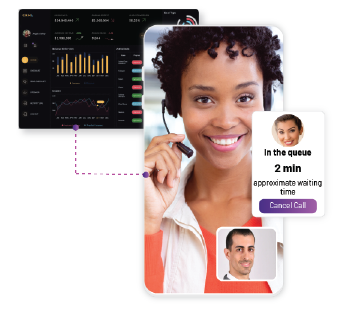
Customer Service: Customer support systems can be greatly enhanced. Flutter allows for the development of smooth, intuitive interfaces, while WebRTC’s real-time video and voice capabilities enable direct customer-agent communication, elevating the service experience.
Social Networking: For social apps, integrating Flutter with WebRTC means creating engaging, real-time communication experiences, from video calls to live streaming, enhancing social interaction in the digital age.
Financial Services: Banks and financial institutions can use these technologies for secure, real-time customer interactions, including video-based KYC processes and customer advisories, offering convenience and enhancing trust.
Essential Features of Your App to App Calling video call flutter app
Peer-to-Peer (P2P) Calls: EnableX ensures high-quality, low-latency P2P communication, essential for a seamless calling experience.
Remote Push Notifications: Essential for alerting users about incoming calls.
Call kit Integration: For Android and iOS, seamlessly integrate the telecom UI to manage call interactions.
EnableX’s Flutter UI kit: Using Flutter’s widgets and EnableX’s UI kit, developers can design intuitive calling interfaces with responsive controls and engaging visuals.
Scalability and Reliability: EnableX’s cloud infrastructure is designed to handle a high volume of concurrent calls, providing scalability and reliability.
Enhance video calls with flutter with EnableX’s UI Kits and Callkit Integration
EnableX’s UI Kits for Flutter
Optimized for Flutter: EnableX provides UI kits that are specifically optimized for Flutter, ensuring seamless integration into Flutter-based applications.
Customizable Design: These kits offer customizable UI components, making it easier for developers to tailor the app’s look and feel according to specific design requirements.
Callkit Integration for Android and iOS in Flutter Apps
Native Mobile Experience: EnableX supports Callkit integration for Android and iOS, allowing Flutter apps to deliver a native-like call handling experience on mobile devices.
Advanced Call Management: This integration enables sophisticated features like call waiting and integration with the mobile contacts, enhancing the functionality of the app.
Getting Started: Your Roadmap
Create an EnableX Account: Head to EnableX’s sign-up page to get your API credentials, including your App ID and App Key.
Set Up Your Flutter Environment: Ensure you have Flutter installed and set up on your machine. If you are new to Flutter, check out the official Flutter installation guide.
Set Up Remote Notification: Set up remote notifications to alert users of incoming calls. Note that EnableX Will not provide any push service for notification. Therefore, app User need to integrate the notification service and handle the notifications based on their business logics.
Flutter to Native Communication: Learn to create method channels in Flutter for sending events to native platforms. This is crucial for events like initiating a call or receiving a call.
Native to Flutter Communication: This involves setting up event channels to send events from native platforms back to Flutter. However, this is used for functionalities like updating the UI based on call status.
Create a Video Project
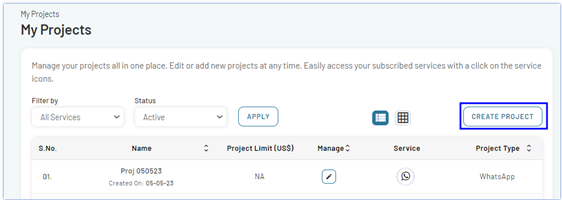
To develop a video conferencing App using Android UI Kit, first, you need to create a Video Project with EnableX Platform. Thus, to create a Video project, do the following:
- Navigate to My Dashboard, go to My Projects section and click on CREATE PROJECT button
- A Create Project form will open. Enter the project-related information like project name, application and description and enable Video in the Channels section.
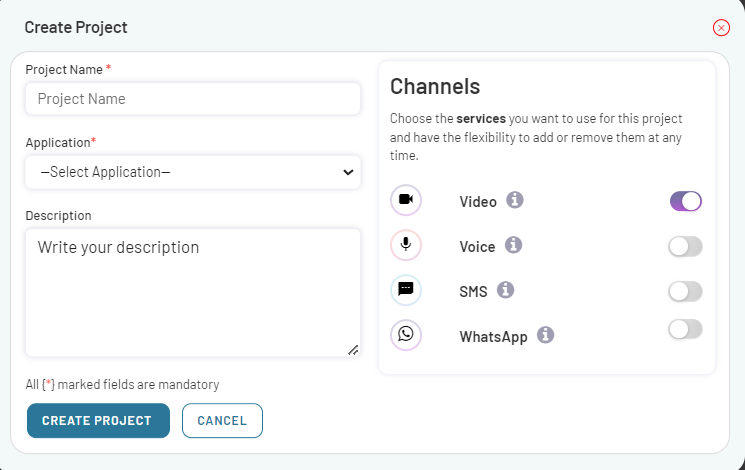
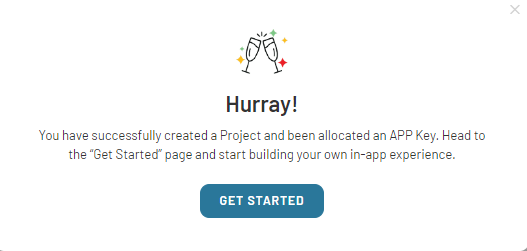
Once you have filled in all the necessary information, click on the CREATE PROJECT button to create your project. Now, a confirmation popup will then appear, confirming the successful creation of your project. Click on GET STARTED to proceed further.
Get APP ID and APP KEY for Android based Video API Conferencing
The App ID and App Key, serve as the username and password, respectively, in the HTTP Base Authentication Request Header of our Video Server API Call.
When you create a project, the API Access Credentials are sent to you via email. However, you may need to reset API Key or resend API Credentials. To know more, read our comprehensive developer documentation.
Create Virtual rooms and Generate Token
How to Create virtual meeting Rooms using video API
To create a room, make an HTTP POST request to the following API route: https://api.enablex.io/video/v2/rooms. You need to include the necessary parameters and values in the request body, which should be in JSON format. For example:
{

  "name": "Topic or Room Title",

  "owner_ref": "xyz",

  "settings": {

    "description": "Descriptive text",

    "mode": "group",

    "scheduled": false,

    "adhoc": false,

    "duration": 30,

    ……….

    ……..

}
To know more about Create Rooms, please read Create Room to carry out RTC Session .
Generate Token
To create a token for joining an RTC session on the EnableX platform, make a POST request to the API route: https://api.enablex.io/v2/rooms/{room-id}/tokens where {room-id} is the ID of the room you want to join. For example:
POST https://api.enablex.io/video/v2/rooms/{room_id}/tokens

Authorization: Basic XXXXXXX

Content-Type: application/json


{

     "name": "User Name",

     "role": "participant",

     "user_ref": "XXX",

     "data": {

        "custom_key": "String",

    "any_key": "String"

     }

}
Upon successful creation, the API will respond with a JSON object containing the result and the generated token (JWT_WEB_TOKEN
{

     "result": 0,

     "token": "JWT_WEB_TOKEN"

 }
To know more about Token, please read Create Token to join a Room.
Integrate Flutter UI Kit into project
Once you have created a video project with the EnableX Platform and established a virtual video meeting room, the next step is to integrate the Flutter UI Kit into your project. Following are the steps:
- Install Flutter UI Kit through pub. V1. 3.
- Add Dependency
Add enx_uikit_flutter as a dependency to your pubspec.yaml file.
- Define required Device Permissions
Firstly, EnableX Flutter UI Kit requires camera and microphone permission to start video call.
For Android:
Open your AndroidManifest.xml file and add the required permissions:
<uses-permission android:name="android.permission.CAMERA" />

<uses-permission android:name="android.permission.RECORD_AUDIO" />
…
For iOS:
In the info.plist, add entries for microphone and camera usage descriptions.
- Handle Camera and Microphone Permissions in Flutter
Create a Common Method for Permissions:
Implement a method to request and check camera and microphone permissions using the permission_handler package.
Future<bool> handlePermissionsForCall(BuildContext context) async {

  ...

  // Permission handling logic

}
Implement a Custom Dialog for Permission Handling:
Show a dialog to the user if permissions are denied or not granted.
void showCustomDialog(BuildContext context, String title, String message, Function okPressed) {

  ...

  // Dialog implementation

}
For more information, please read Flutter UI Kit.
Once device permission is granted, move to the next steps.
- Implement Flutter UI Kit
Import Package at the top of your Dart file and Initialize EnxVideoView with a valid token and handle callbacks for connection errors or disconnections.
import 'package:enx_uikit_flutter/enx_uikit_flutter.dart';

EnxVideoView(

  token: token,

  connectError: (Map<dynamic, dynamic> map) {

    ...

  },

  disconnect: (Map<dynamic, dynamic> map) {

    ...

  },

);- UI Customization
Utilize EnxSetting in your Flutter app to customize UI elements such as bottom and top options, configure participant lists, and create extra buttons.
var setting = EnxSetting.instance;

setting.createBottomOption(BottomOption.audio);

...

setting.configureParticipantList(ParticipantListOption.disconnect);

...
Import the Native Call Kit Component into Your Project
Please read:
- EnableX’s Android Calling UI Framework
- EnableX’s iOS Calling UI Framework
Bridging Flutter with Native Platforms:
To develop a real-time Flutter communication application, it’s crucial to understand how Flutter communicates with native code. This is achieved through two primary channels: Method Channels and Event Channels.
Notifying Events from Flutter to Native: Using Method Channels
Method Channels serve as a communication bridge between Flutter and native code. Moreover, method Channels are used to send data from Flutter to the native side (iOS or Android). This is particularly useful when you need to trigger native functions from your Flutter app.
In Flutter:
- Create a MethodChannel with a unique identifier.
- Send data or trigger events using this channel.
Flutter code snippet for reference:
static const platform = MethodChannel('flutter.native/helper');

//Sent event to iOS/Android

Future _getInformation() async {

    try {

        var result = await platform.invokeMethod('Event NAme');

        tokenValue = result;

        } on PlatformException catch (e) {

            tokenValue = "Failed to get battery level: '${e.message}'.";

        }

    print(tokenValue);

}
In iOS (Swift):
- In the AppDelegate, register the FlutterMethodChannel with the same identifier.
- Set a method call handler to respond to Flutter events.
An iOS sample code in Swift:
In AppDelegate.swift class

At didFinishLaunchingWithOptions method

          var flutterChannel  = FlutterMethodChannel(name: "flutter.native/helper",

                                                    binaryMessenger: controller.binaryMessenger)

Register the event listener from the flutter

        flutterChannel.setMethodCallHandler({[weak self] (call: FlutterMethodCall , result : FlutterResult) -> Void in

          if call.method.caseInsensitiveCompare("Your Event Name which you have set in flutter") == .orderedSame{

              //Take Action in iOS Native

          }

      })
In Android (Kotlin):
- In the MainActivity, set up the MethodChannel and override the onMethodCall to handle calls from Flutter.
Example Kotlin code:
In Main Activity class

    private val channel = "flutter.native/helper"

    //Override methods

    override fun configureFlutterEngine(@NonNull flutterEngine: FlutterEngine) {

        super.configureFlutterEngine(flutterEngine)

        EventChannel(flutterEngine.dartExecutor, eventHandlerChannel).setStreamHandler(

            object : StreamHandler(), EventChannel.StreamHandler {

                override fun onListen(arguments: Any?, events: EventSink?) {

                    if (events != null) {

                        eventsL=events

                        events.success(arguments);

                    }

                }

                override fun onCancel(arguments: Any?) {

                    eventsL=null

                }

            }

        )

        MethodChannel(flutterEngine.dartExecutor.binaryMessenger, channel).setMethodCallHandler {

            // This method is invoked on the main thread.

                call, result ->

        }

    }
Communication from Native to Flutter: Using Event Channels
Event Channels are used for streaming continuous data or events from the native side back to Flutter. This is important for updating the Flutter UI based on native events.
Setting Up Event Channels
In Flutter:
- Define an EventChannel with a specific channel name.
- Listen to this channel to receive events from the native platform.
Flutter code snippet for reference:
static const EventChannel eventChannel = EventChannel('flutter.native/helperCallBacks');

    void _onEvent(Object event) {

    print("Test Callback$event");

  }
In this code, Flutter listens to an event channel named flutter.native/helperCallBacks and prints any events received.
In iOS (Swift):
- Set up a FlutterEventChannel in the AppDelegate.swift class with the same channel name.
- Handle the listener from Flutter and use an eventSink to send events back to Flutter.
An iOS sample code in Swift:
In AppDelegate.swift class

    private var eventSink: FlutterEventSink?

At didFinishLaunchingWithOptions method

                let chargingChannel = FlutterEventChannel(name: "flutter.native/helperCallBacks",

                                                    binaryMessenger: controller.binaryMessenger)

          chargingChannel.setStreamHandler(self)

*Handel the listener from Flutter to iOS

//Update the eventSink on the listener

    func onListen(withArguments arguments: Any?, eventSink events: @escaping FlutterEventSink) -> FlutterError? {

        self.eventSink1 = events

        return nil

    }

    func onCancel(withArguments arguments: Any?) -> FlutterError? {

        // to do

        eventSink1 = nil

        return nil

    }

   //Send event back to flutter

           eventSink("callAnswer")
This Swift code snippet listens for Flutter’s requests and can send data back to Flutter through the eventSink.
In Android (Kotlin):
- In the main Android activity, set up an EventChannel and override its methods to handle communication with Flutter.
For example Kotlin code:
In Main Activity class

    private val eventHandlerChannel = "flutter.native/helperCallBacks"

    private var eventsL: EventSink? = null

    //Override methods

    var enxCallKitStateObserver=  object : EnxCallKitStateObserver {

                   eventsL?.success("callAnswer")

           }
This Kotlin code sets up an EventChannel and provides mechanisms to send events back to the Flutter side.
We have explored the realms of Flutter and EnableX, uncovering the potential of these powerful platforms in building app-to-app calling features.
For those eager to explore more, I recommend visiting the official Flutter documentation , EnableX resources and App to App Calling with Flutter sample App. However, these resources offer extensive guides and community support to aid your development journey.